K3sでCiliumを試してみる。
Ciliumは、「スリィアム」と読むらしい。FlannelやCalicoのようなCNIである。iptableを使わず、Kernelでパケットを処理するらしい。3大クラウドでも採用されるらしい。調べれば調べるほど面白い。最初はよく分からずFlannelを使っていたが、そのうち、Calicoが良さげと聞いて使っていたが今回は、Ciliumへ浮気である。本名はどれになるのか???
今回は手っ取り早く軽くできるk3sでまずはトライをする。ストレージ関連は今回はおまけなのでLonghornのところは確認はすっ飛ばしてある。ドキュメントの通りにやっていくと、Hubble UIのところで、serviceがバッテイングする。エラーをみればどうすれば対応できると思うが。
事前準備
- OS: Ubuntu Server 20.05でクリーンインストールのもの。前提パッケージや事前のOS設定も一切不要。ホスト名とIPアドレスが設定されていればOK。arm64でも動いた。
- リソース: 1 CPU / 1GB RAM以上 HDDディスクは、/dev/sdaとして、20GB+コンテナストレージ容量 (Longhornはノードのローカルパスを使う)
- Network: 1 NIC (17IPアドレスが必要。 Metallbを使うため。)
k3sインストール
CNIとPolicyを無効化してインストール。つまりナシナシの無しで構成する。諸事情で、Kubernetes versionは、1.23を選択。
sudo -i
curl -sfL https://get.k3s.io | INSTALL_K3S_CHANNEL=v1.23 K3S_KUBECONFIG_MODE="644" INSTALL_K3S_EXEC='server --disable traefik --disable servicelb --flannel-backend=none --disable-network-policy' sh -
ナシナシの無しなので、起動ができたどうかは、ノードの確認くらい。この時点でpodを確認してもpendingのままで意味がない。(闇雲に一個一個確認する癖のある人は悩むかもしれない。)
kubectl get node -o wide
![]()
追加設定や必要なコマンドのインストール
mkdir -p ~/.kube
cp /etc/rancher/k3s/k3s.yaml ~/.kube/config
chmod 600 ~/.kube/config
kubectl label node `hostname` node-role.kubernetes.io/worker=worker
kubectl completion bash > /etc/bash_completion.d/kubectl
source /etc/bash_completion.d/kubectl
crictl completion bash > /etc/bash_completion.d/crictl
source /etc/bash_completion.d/crictl
curl -fsSL -o get_helm.sh https://raw.githubusercontent.com/helm/helm/main/scripts/get-helm-3
chmod 700 get_helm.sh
./get_helm.sh
rm ./get_helm.sh
helm completion bash > /etc/bash_completion.d/helm
source /etc/bash_completion.d/helm
Cilium CLIのインストール
CILIUM_CLI_VERSION=$(curl -s https://raw.githubusercontent.com/cilium/cilium-cli/master/stable.txt)
CLI_ARCH=amd64
if [ "$(uname -m)" = "aarch64" ]; then CLI_ARCH=arm64; fi
curl -L --fail --remote-name-all https://github.com/cilium/cilium-cli/releases/download/${CILIUM_CLI_VERSION}/cilium-linux-${CLI_ARCH}.tar.gz{,.sha256sum}
sha256sum --check cilium-linux-${CLI_ARCH}.tar.gz.sha256sum
tar xzvfC cilium-linux-${CLI_ARCH}.tar.gz /usr/local/bin
rm cilium-linux-${CLI_ARCH}.tar.gz{,.sha256sum}

export HUBBLE_VERSION=$(curl -s https://raw.githubusercontent.com/cilium/hubble/master/stable.txt)
HUBBLE_ARCH=amd64
if [ "$(uname -m)" = "aarch64" ]; then HUBBLE_ARCH=arm64; fi
curl -L --fail --remote-name-all https://github.com/cilium/hubble/releases/download/$HUBBLE_VERSION/hubble-linux-${HUBBLE_ARCH}.tar.gz{,.sha256sum}
sha256sum --check hubble-linux-${HUBBLE_ARCH}.tar.gz.sha256sum
sudo tar xzvfC hubble-linux-${HUBBLE_ARCH}.tar.gz /usr/local/bin
rm hubble-linux-${HUBBLE_ARCH}.tar.gz{,.sha256sum}
Ciliumのインストール
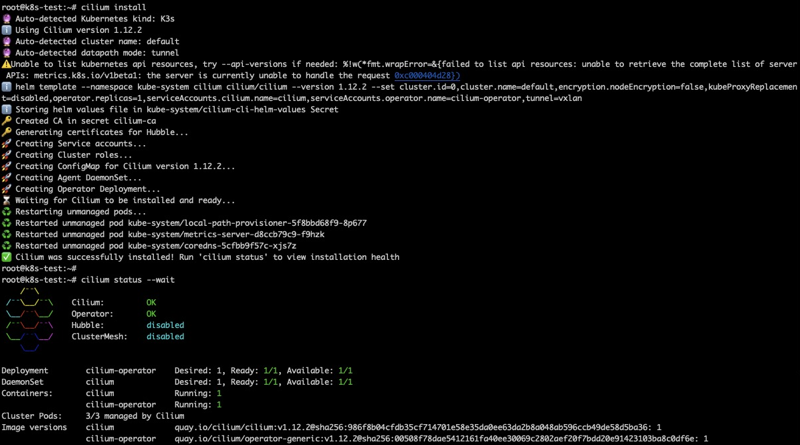
cilium install
cilium status --wait

ここでようやくpodやserviceの確認
kubectl get pod,svc -A

ここからは俗に言う普通通り。
Metallbのインストール
METALLBVER=0.13.7
kubectl apply -f https://raw.githubusercontent.com/metallb/metallb/v${METALLBVER}/config/manifests/metallb-native.yaml
kubectl -n metallb-system wait pod -l app=metallb --for condition=Ready --timeout 60s
確認
kubectl -n metallb-system get deployments.apps

IP Poolの設定
IPRANGEに割り当てるIPアドレスを定義する。実は、あるバージョンからIPアドレスの定義がconfigからクラスタリソースになった。
IPRANGE=192.168.16.200-192.168.16.216
cat <<EOF | kubectl create -n metallb-system -f -
apiVersion: metallb.io/v1beta1
kind: IPAddressPool
metadata:
name: first-pool
namespace: metallb-system
spec:
addresses:
- ${IPRANGE}
EOF
cat <<EOF | kubectl create -n metallb-system -f -
apiVersion: metallb.io/v1beta1
kind: L2Advertisement
metadata:
name: example
spec:
ipAddressPools:
- first-pool
EOF
ingress-systemのインストール
helm repo add ingress-nginx https://kubernetes.github.io/ingress-nginx
helm repo update
helm install ingress-nginx ingress-nginx/ingress-nginx --create-namespace -n ingress-system
kubectl -n ingress-system wait pod -l "app.kubernetes.io/name=ingress-nginx" --for condition=Ready --timeout 60s
確認
kubectl -n ingress-system get deployments.apps

kubectl get svc -n ingress-system

ingress-nginx-controllerにIPアドレスが振られていればOK。
Hubble UIをインストール
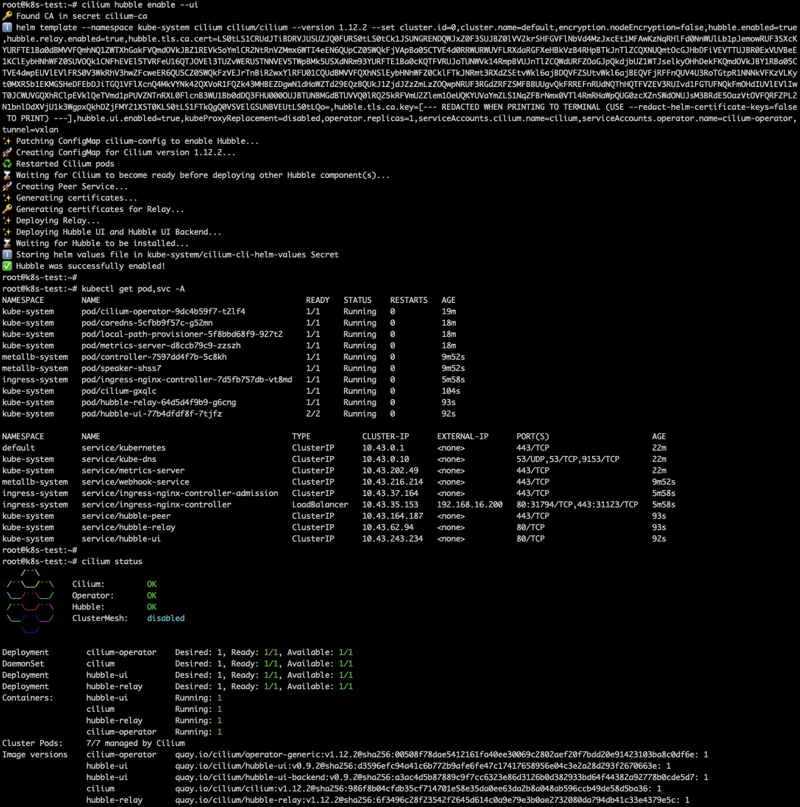
ポートフォワードすればいいのだが、面倒くさいので、Loadbalancerに切り替えている。statusではHubbleが有効になったのが確認できる。
cilium hubble enable --ui
kubectl get pod,svc -A
cilium status
kubectl -n kube-system patch svc hubble-ui -p '{"spec":{"type": "LoadBalancer"}}'

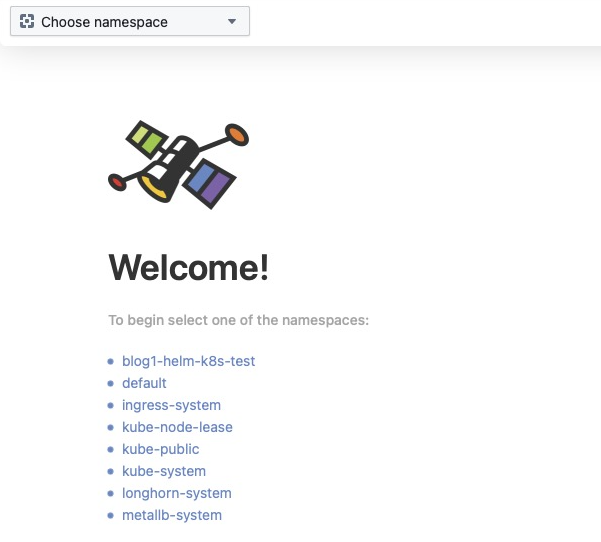
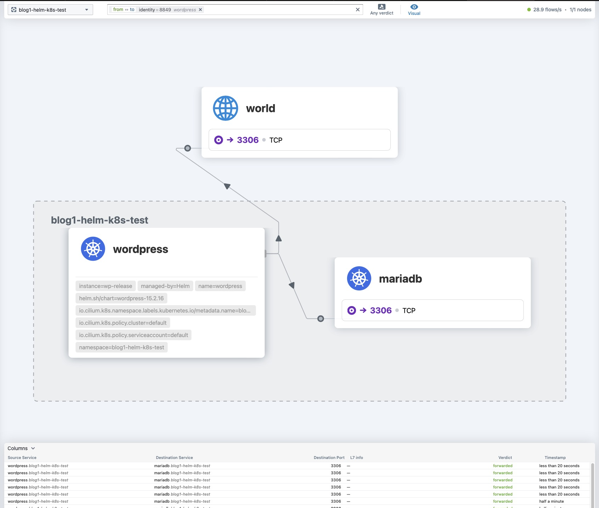
こんな感じのUIが表示できる。

あとで入れたwordpress.

Longhornのインストール
External Snapshotterのインストール
SNAPSHOTTERVER=5.0.1
# Apply VolumeSnapshot CRDs
kubectl create -f https://raw.githubusercontent.com/kubernetes-csi/external-snapshotter/v${SNAPSHOTTERVER}/client/config/crd/snapshot.storage.k8s.io_volumesnapshotclasses.yaml
kubectl create -f https://raw.githubusercontent.com/kubernetes-csi/external-snapshotter/v${SNAPSHOTTERVER}/client/config/crd/snapshot.storage.k8s.io_volumesnapshotcontents.yaml
kubectl create -f https://raw.githubusercontent.com/kubernetes-csi/external-snapshotter/v${SNAPSHOTTERVER}/client/config/crd/snapshot.storage.k8s.io_volumesnapshots.yaml

# Create Snapshot Controller
curl --retry 10 --retry-delay 3 --retry-connrefused -sSOL https://raw.githubusercontent.com/kubernetes-csi/external-snapshotter/v${SNAPSHOTTERVER}/deploy/kubernetes/snapshot-controller/rbac-snapshot-controller.yaml
sed -i -e "s/namespace: default/namespace: kube-system/g" rbac-snapshot-controller.yaml
kubectl create -f rbac-snapshot-controller.yaml
rm -rf rbac-snapshot-controller.yaml
curl --retry 10 --retry-delay 3 --retry-connrefused -sSOL https://raw.githubusercontent.com/kubernetes-csi/external-snapshotter/v${SNAPSHOTTERVER}/deploy/kubernetes/snapshot-controller/setup-snapshot-controller.yaml
sed -i -e "s/namespace: default/namespace: kube-system/g" setup-snapshot-controller.yaml
kubectl create -f setup-snapshot-controller.yaml
rm setup-snapshot-controller.yaml
kubectl -n kube-system wait pod -l app=snapshot-controller --for condition=Ready --timeout 60s
Longhornのインストールの事前準備
sed -i -e "s/debian/debian.$(hostname)/g" /etc/iscsi/initiatorname.iscsi
systemctl restart iscsid.service
apt -y install nfs-common jq
Longhornのインストール
CSIスナップショットを利用するためにダッシュボードでちまちま設定をしていたのだが、helmで入れるとそれが不要なのが判明。
curl -sSfL https://raw.githubusercontent.com/longhorn/longhorn/master/scripts/environment_check.sh | bash
helm repo add longhorn https://charts.longhorn.io
helm repo update
kubectl create namespace longhorn-system
helm install longhorn longhorn/longhorn --namespace longhorn-system --set defaultSettings.backupTarget="s3://backupbucket@us-east-1/" --set defaultSettings.backupTargetCredentialSecret="minio-secret"
cat <<EOF | kubectl apply -f -
kind: VolumeSnapshotClass
apiVersion: snapshot.storage.k8s.io/v1
metadata:
annotations:
snapshot.storage.kubernetes.io/is-default-class: "true"
name: longhorn
driver: driver.longhorn.io
deletionPolicy: Delete
EO
kubectl -n longhorn-system wait pod -l app=longhorn-manager --for condition=Ready --timeout 360s
kubectl -n longhorn-system wait pod -l app=longhorn-conversion-webhook --for condition=Ready --timeout 360s
kubectl -n longhorn-system wait pod -l app=longhorn-driver-deployer --for condition=Ready --timeout 360s
kubectl -n longhorn-system wait pod -l app=longhorn-ui --for condition=Ready --timeout 360s

LONGHORNMINIO=$(kubectl -n longhorn-system describe deployments.apps longhorn-admission-webhook | grep "app.kubernetes.io/version" | cut -d "=" -f 2 | uniq)
kubectl create -f https://raw.githubusercontent.com/longhorn/longhorn/${LONGHORNMINIO}/deploy/backupstores/minio-backupstore.yaml
kubectl wait pod -l app=longhorn-test-minio --for condition=Ready --timeout 720s

kubectl -n longhorn-system patch svc longhorn-frontend -p '{"spec":{"type": "LoadBalancer"}}'
kubectl patch storageclass local-path -p '{"metadata": {"annotations":{"storageclass.kubernetes.io/is-default-class":"false"}}}'
ネットワーク周りは現職だと本業ではないからここいらまで。。。手元の環境も問題なく移行ができた。
とあとで気がついた。Ingressは入れる必要はなく、Ciliumでいけそうだった。ブログはここまでで。。。